透視変換とは 変換前後の4点の座標を指定し 画像を変換することです。画像の回転が3点を指定するのに対し 透視変換は4点を指定します。変換処理は 図形の回転同様 以下の2段階の手順で行います。
- GetPerspectiveTransform メソッドで 変換行列を求めます。
- WarpPerspective メソッドで求めた変換行列に基づいて 実際に変換処理を行います。
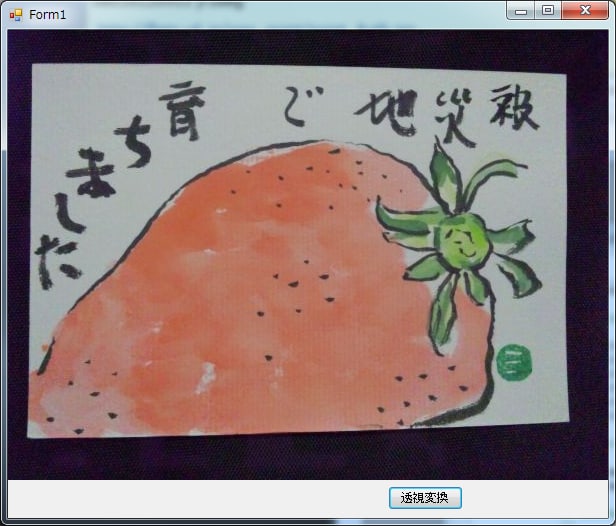
多くのサンプルでは 遠近法っぽい効果を出すサンプルが多いのですが ここではカメラで撮影した若干ひずんだ画像を歪を補正する処理をしました。サンプルで使ったのは カミさんが書いた絵手紙です。彼女は自分が書いた絵手紙をブログに載せていますので興味のある方はご覧ください。(こちら)
またここに書いてあるイチゴは昨年の東日本大震災で大きな被害を受け ハウスが全滅したにもかかわらず 多くの人の力で今年もおいしくいただけた宮城県山元町のイチゴです。
| 変換前の画像 |

葉書の4つの頂点の座標は ペイントで調べると (24, 33), ( 19, 407), (560, 392), (558, 45) です。
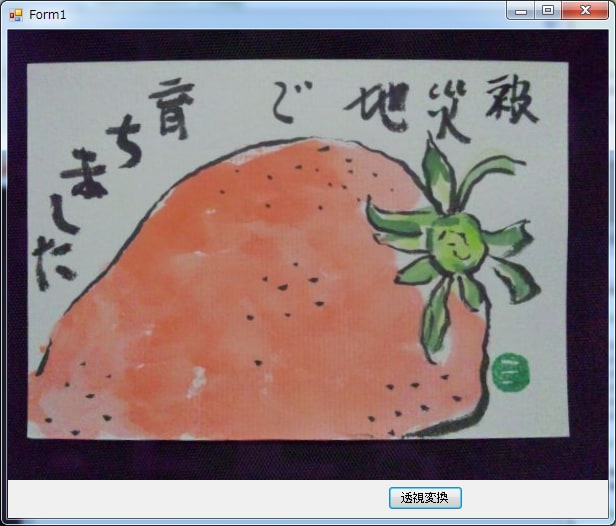
この4点を(19, 33), ( 19, 407), (560, 407), (560, 33) に変換すると右側が細くなった歪んだ葉書がすっきりした 長方形になるはずです。
| コーディング |
using System;
using System.Collections.Generic;
using System.ComponentModel;
using System.Data;
using System.Drawing;
using System.Text;
using System.Windows.Forms;
using OpenCvSharp;
namespace OpenCvShp
{
    public partial class Form1 : Form
    {
        private IplImage img;
        public Form1()
        {
            InitializeComponent();
        }
        private void timer1_Tick(object sender, EventArgs e)
        {
            img = new IplImage(@"C:OpenCvTestDataichigo1.jpg", LoadMode.Color);
            timer1.Enabled = false;
            pictureBox1.Invalidate();
        }
        private void btnPerspective_Click(object sender, EventArgs e) {
            CvPoint2D32f[] src_pf = new CvPoint2D32f[] {
                                                new CvPoint2D32f(24, 33), new CvPoint2D32f( 19, 407),
                                                new CvPoint2D32f(560, 392), new CvPoint2D32f(558, 45) };
            CvPoint2D32f[] dst_pf = new CvPoint2D32f[] {
                                                new CvPoint2D32f(19, 33), new CvPoint2D32f( 19, 407),
                                                new CvPoint2D32f(560, 407), new CvPoint2D32f(560, 33) };
            CvMat perspective_matrix = Cv.GetPerspectiveTransform(src_pf, dst_pf);
            Cv.WarpPerspective(img, img, perspective_matrix,Interpolation.Linear, new CvScalar(0,0,0));
            pictureBox1.Invalidate();
        }
        private void pictureBox1_Paint(object sender, PaintEventArgs e)
        {
            if (!timer1.Enabled)
            {
                Bitmap bmp = new Bitmap(img.Width, img.Height);
                bmp = img.ToBitmap();
                e.Graphics.DrawImage(bmp, 0, 0, bmp.Width, bmp.Height);
                bmp.Dispose();
            }
        }
    }
}
| 変換後の画像 |

葉書がきれいな長方形になっています。
| Windows7 Vs2008 OpenCv2.4 And OpenCvSharp |